
| Battle of Diamond Hill | |||||||
|---|---|---|---|---|---|---|---|
| Part of Second Boer War | |||||||
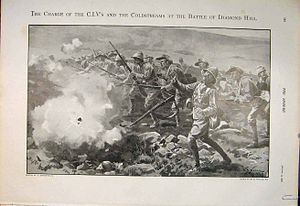
 The Charge of the City of London Imperial Volunteers ('CIVs') and Coldstreams at the Battle of Diamond Hill, after a drawing by William Barnes Wollen | |||||||
| |||||||
| Belligerents | |||||||
|
| |||||||
| Commanders and leaders | |||||||
|
Lieutenant-General John French Lieutenant-General Ian Hamilton |
| ||||||
| Strength | |||||||
| 20,000 men and 83 guns[1] | up to 6,000 men and 30 guns[1] | ||||||
| Casualties and losses | |||||||
| 28 killed and 145 wounded[1] |
about 30 killed and wounded Several captured[1] | ||||||
The Battle of Diamond Hill (Donkerhoek) (Afrikaans: Slag van Donkerhoek) was an engagement of the Second Boer War that took place on 11 and 12 June 1900 in central Transvaal.
The Boer forces retreated to the east by the time the capital of the South African Republic (Transvaal), Pretoria, was captured by British forces on 5 June 1900. British Commander-in-Chief in South Africa Field Marshal Lord Roberts had predicted a Boer surrender upon the loss of their capital, but when this was not fulfilled, he began an attack to the east in order to push Boer forces away from Pretoria and enable an advance to the Portuguese East Africa border.[1]
The commandant-general of Transvaal, Louis Botha, established a 40-kilometer north to south defense line 29 kilometers east of Pretoria; his forces numbered up to 6,000 men and 30 guns. The Pretoria–Delagoa Bay rail line ran eastward through the center of the Boer position. Personnel from the South African Republic Police manned positions at Donkerpoort just south of the railway in the hills at Pienaarsport, while other troops held positions at Donkerhoek and Diamond Hill. Botha commanded the Boer center and left flank and General Koos de la Rey commanded north of the railway line.[1]
The British cavalry were under the command of Sir Ian Hamilton. He despatched Robert Broadwood's 2nd Cavalry Brigade, which included the 10th Royal Hussars, 12th Royal Lancers and the Household Cavalry Regiment, on a Special Mission.
As the sun came up it was a "bitterly cold Monday morning...we are hidden in the hills at Donkerhoek...ready for battle..." confided Botha to his diary.[2]
As a detachment of 10th Hussars swung off to the right, they were attacked from Diamond Hill. A section of Q Battery RHA attempted to return artillery fire, but had no infantry support, until the 12th Lancers arrived on the front line. Lord Airlie took 60 men to clear the Boers from the guns, and in the ensuing exchange of rifle fire at short-range, Lord Airlie was killed. The Boers pressed the matter hard. Two squadrons of Household Cavalry Regiment and one squadron of the 12th Hussars charged at full gallop at Boers firing from concealed positions. The enemy dispersed.[3]
On 13th the Botha's army retreated to the north, they were chased as far as Elands River Station, only 25 miles from Pretoria, by Mounted Infantry and De Lisle's Australians.[4][5][6][7]
Forty-four years after the battle, British General Ian Hamilton opined in his memoirs that "the battle, which ensured that the Boers could not recapture Pretoria, was the turning point of the war". Hamilton credited war correspondentWinston Churchill with recognizing that the key to victory would be in storming the summit, and risking his life to signal Hamilton.[8]
| South African Field Force | Field Marshal Lord Roberts |
| Cavalry Division (Lieutenant General John French) | |
| 1st Cavalry Brigade: Colonel T.C. Porter | 4th Cavalry Brigade: Major General J.B.B. Dickson |
| 2nd Dragoons (Royal Scots Greys) | 7th Dragoon Guards |
| 6th (Inniskilling) Dragoons | 8th King's Royal Irish Hussars |
| Carabiniers (6th Dragoon Guards) | 14th King's Hussars |
| New South Wales Lancers | O Battery Royal Artillery |
| 1st Australian Horse | E Section Pom-Poms |
| T Battery Royal Horse Artillery | |
| J Section Pom-Poms | |
| 1st Mounted Infantry Brigade (Major-General Edward Hutton) | |
| 1st Corps Mounted Infantry: Lt-Col. Edwin Alderson | 3rd Corps Mounted Infantry: Lt-Col. Thomas Pilcher |
| 1st Canadian Mounted Rifles | Queensland Mounted Infantry |
| 2nd Canadian Mounted Rifles | New Zealand Mounted Infantry |
| 1st Battalion Mounted Infantry | 3rd Battalion Mounted Infantry |
| G Battery Royal Horse Artillery | |
| C Section Pom-Poms | |
| 4th Corps Mounted Infantry: Colonel St.G.C. Henry | |
| South Australian Mounted Rifles | 4th Battalion Mounted Infantry |
| Tasmanian Mounted Infantry | J Battery Royal Horse Artillery |
| Victorian Mounted Rifles | L Section Pom-Poms |
| 7th Imperial Yeomanry[9] | |
| 11th Division (Lieutenant General Reginald Pole-Carew) | |
| 1st (Guards') Brigade: Major-General Inigo Jones | 18th Brigade: Major General T.E. Stephenson |
| 3rd Grenadier Guards | 1st Essex |
| 1st Coldstream Guards | 1st Yorkshire |
| 2nd Coldstream Guards | 2nd Royal Warwickshire |
| 1st Scots Guards | 1st Welsh |
| Mounted Infantry: | |
| 2nd West Australian Mounted Infantry | Struben's Scouts |
| Prince Alfred's Guard (detachment) | 12th Imperial Yeomanry |
| Artillery: | |
| 83rd Field Battery, Royal Artillery | 2 x Naval 4.7-inch guns (Bearcroft's) |
| 84th Field Battery, Royal Artillery | 2 x Naval 12-pounders |
| 85th Field Battery, Royal Artillery | 2 x 5-inch siege guns (Foster's)[10][11] |

{{cite book}}: Invalid |ref=harv (help) – Official history{{cite book}}: Invalid |ref=harv (help){{cite encyclopedia}}: Invalid |ref=harv (help)